There are several different ways to print item labels; you can print labels for everything in a location or bin, everything you just ordered or received, or individual item labels.
Before discussing how to actually print the labels though, let's cover the configuration. This includes setting up your default label size and telling EPASS which printer to use for each label size.
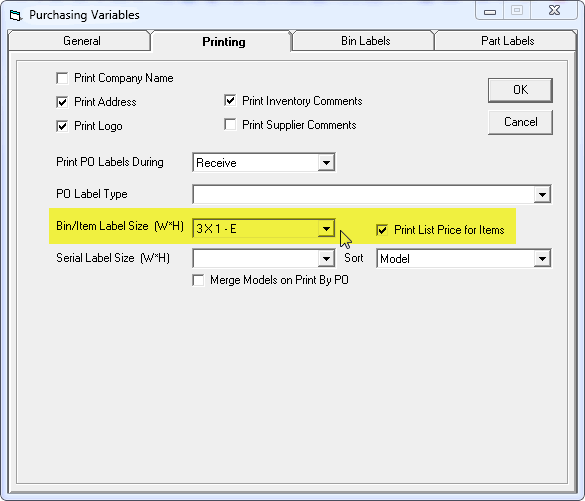
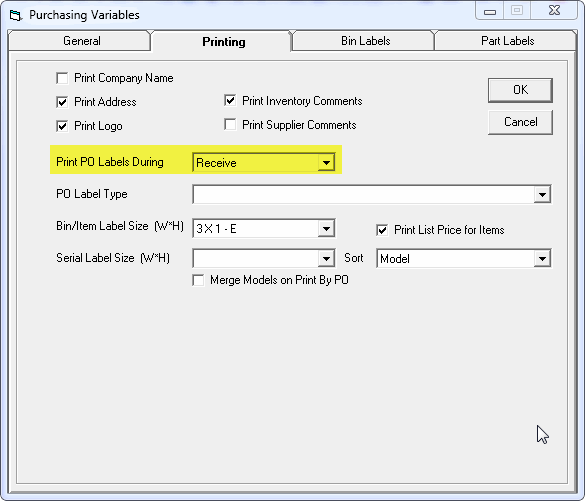
Go to Tools > System Maintenance > Variables > Purchasing. On the printing tab, select the label size that you have decided to use and it will now be your default. If you will typically print list prices on the labels, check the Print List Price box. You can always change this each time you print labels so select the most common setting.
Next, go to File > Terminal Settings.
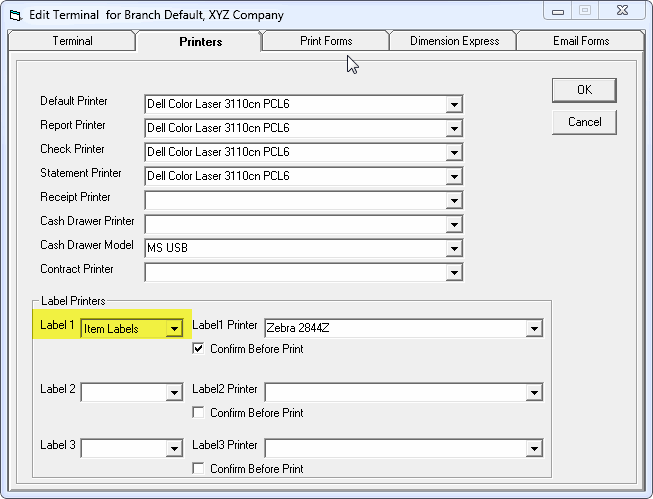
Make sure that at least one label printer is set to "Item Labels" and you have the correct label printer selected. Make sure you choose it from the drop down as these printer names are case sensitive. When you're first testing label printing, you should have Confirm Before Print checked but, once you are confident that the setting are correct, feel free to uncheck it. That will save you one click every time you print labels.
In addition to these settings, you need to make sure the label size is set correctly on your label printer. Typically this is done by going into the printer properties of your label printer (through the Control Panel) and setting the page size there. Each label printer can be different so please consult the label printer manual if you are having troubles.
To print labels for item inventory, click the button on the toolbar
 that looks
like a roll of labels. This will allow you to print labels either
in a batch, by PO, by location/bin, or by individual part number.
that looks
like a roll of labels. This will allow you to print labels either
in a batch, by PO, by location/bin, or by individual part number.
Before printing labels in a batch, you need to understand how the batches work. A label batch allows you to order or receive on multiple POs while all the related items are just added to the batch. Once you are finished ordering or receiving, you can print everything that is in that batch. After the labels have printed, the batch gets cleared out. Most companies that use the batch printing method print the labels after receiving but, the batch can accumulate during ordering instead. Make sure you set the following option appropriately in purchasing variables.
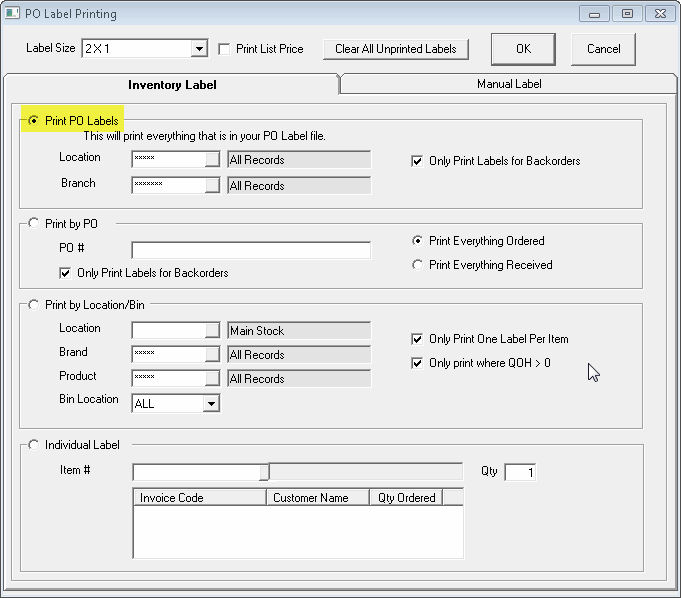
Before you print labels from a batch for the first time, make sure you click the "Clear All Unprinted Labels" button. This will clear out the batch. If you have been using EPASS for a while then you could thousands of items or more in your batch.
![]()
After you have done some receiving, to print your label batch just choose the "Print PO Labels" option then click OK. You can also filter this out and only print for a certain branch/location, or you can choose to only print labels for backordered items. Some companies choose to print labels only for backordered items as opposed to all items. After the labels print you will get a message asking if they printed OK or not. Clicking Yes will clear out the label batch and clicking No will not. Unless there was actually a problem printing you should click Yes.
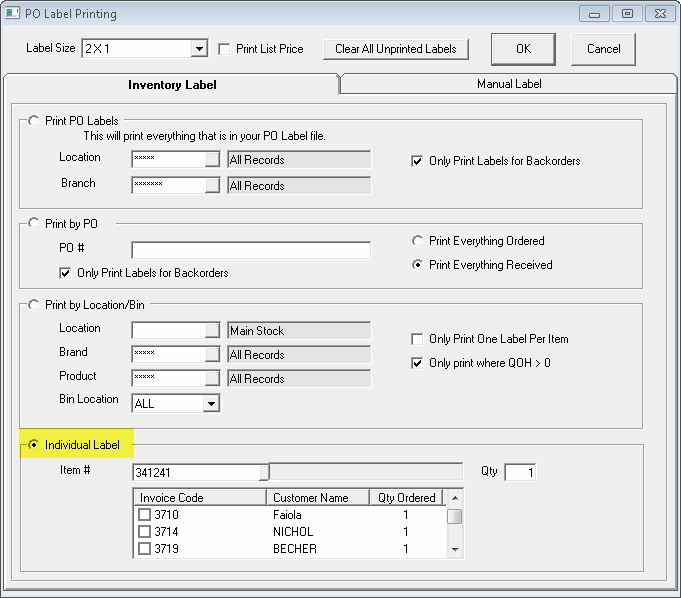
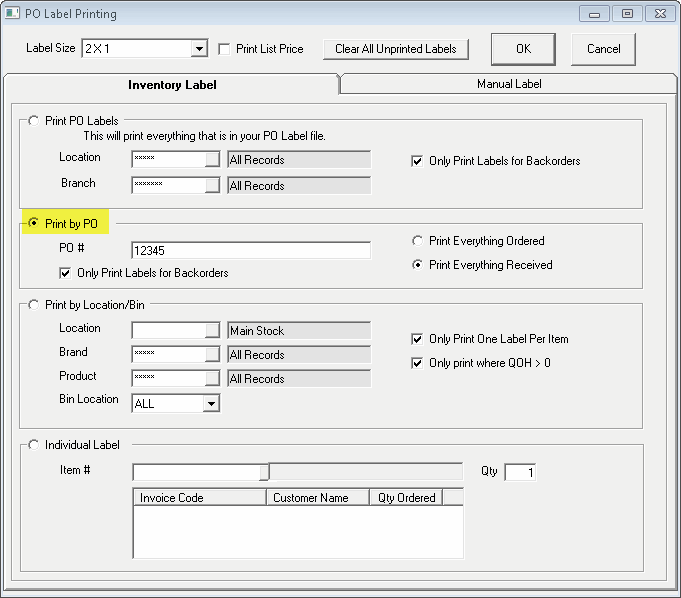
The next method of printing labels is by PO. This method simply allows you to type in the PO number and print labels for everything on that PO. This option does not care when the parts were ordered or received though, it will just print everything ordered or received depending on which option you select.
Printing labels by bin or location is typically done either when you're going live with EPASS, or you're just getting started with item labelling. You can choose to print by location, brand, product, and bin. The Only Print One Label Per Item option would be used if you are printing labels for a bin that contains boxes of small items like screws, nuts, bolts, etc. In this case, you may only want to put one label on the box rather than one label for every item.

The last option is to print labels for an individual item. This is typically used to reprint labels for whatever reason. After you have entered the item number, if there are any invoices that have that item on backorder, you will see a list below. If your label prints backorder information and you're reprinting a label for a backordered item, make sure you select the correct invoice.