Updated December 5, 2022
You can print labels for serial inventory before you have received the product or to re-print a label after the product is already in EPASS. Printing labels before you have received the product is what you will you do when a shipment arrives and it's time to scan the product in. Printing labels after the product is already in EPASS can be done for a few different reasons, such as transferring to the floor and printing a smaller label, re-printing a damaged or lost label, or printing labels for an entire location when you're getting ready to go live with EPASS or just starting to use wireless inventory.
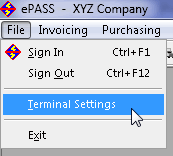
First, go to File > Terminal Settings.

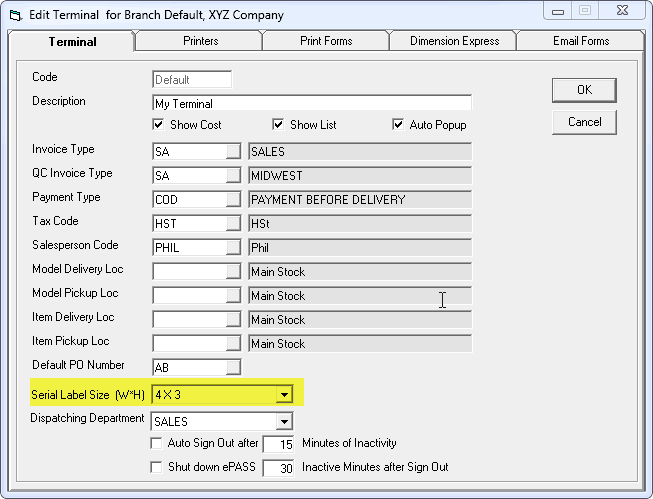
Next, make sure the "Serial Label Size" is set to the most common label that will be printed from this terminal. Each terminal can have its own default label size.
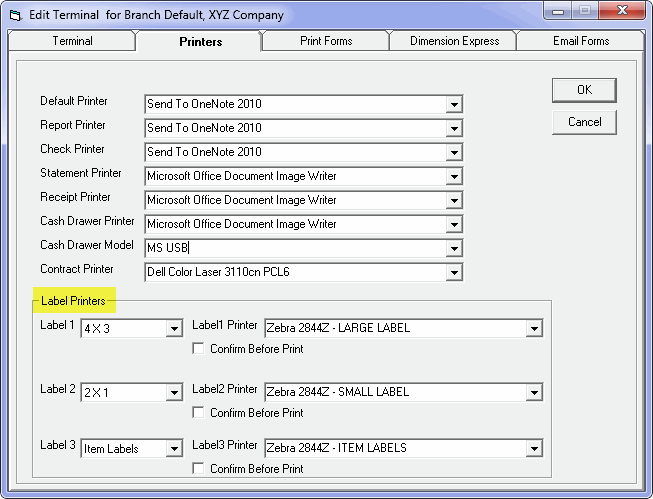
Then make sure that, for all the different label sizes you may print from this terminal, you have the correct label printer selected. Make sure you choose it from the drop down as these printer names are case sensitive. When you're first testing label printing, you should have "Confirm Before Print" checked but, once you are confident that the settings are correct, feel free to uncheck it. That will save you one click every time you print labels.
 Note:
In addition to these settings you need to make sure the label size is
set correctly on your label printer. Typically this is done by going
into the Printer Properties of your label printer (through the Control
Panel) and setting the page size there. Each label printer can be
different so please consult the label printer manual if you are having
troubles with this.
To print labels for receiving, press the button on the toolbar  that looks like a barcode. If the product
has already arrived, you should have the packing slip with you to print
labels. It is also possible with some suppliers to find out in advance
what product you will be receiving. In that case you'll just use
that list of product to determine which labels to print.
Once you are in the label printing screen, the first step is to type in the PO numbers of the product that is coming in. You can also enter the packing slip number, but that is optional. Enter each PO/packing slip, then click the small Add button (or press Enter) to add those POs to the list. As you add each PO, you will also see all of the outstanding product on those POs appear in the list below.
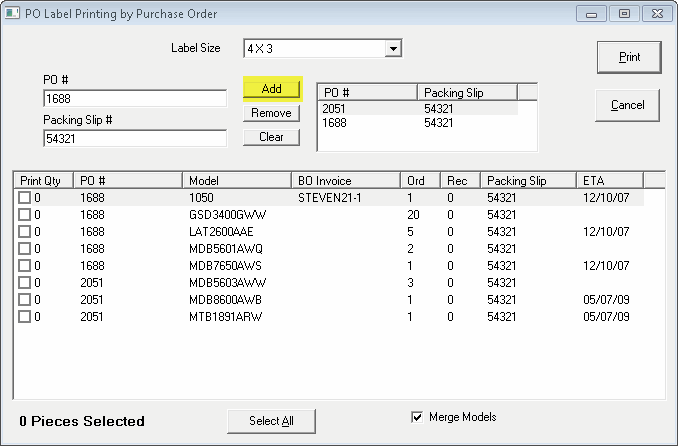
Once you have entered all the POs that you have product coming in on, then you just need to check off all of the product that is coming in. The counter at the bottom left of the screen should match the count on your packing slips.
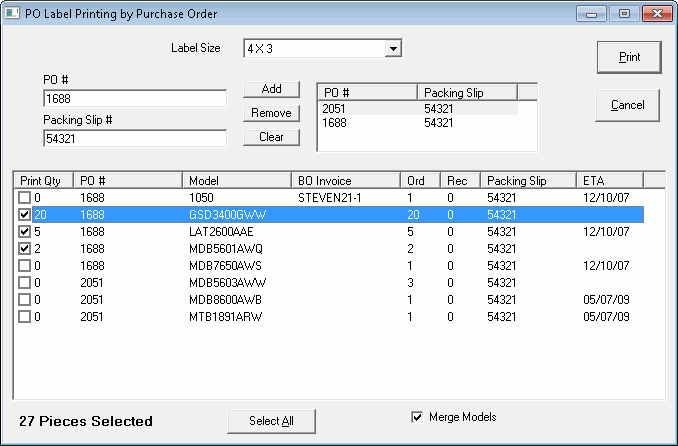
In the case that didn't receive all of one model that you ordered, you can change the quantity of labels that will print. For example, if you only received 15 of the 20 GSD3400GWW that were ordered, just click on that line to highlight it, then click one more time in the Print Qty column and it will change to a box that allows you to change the quantity. Once you've change the quantity, either click away from that box or press Enter.
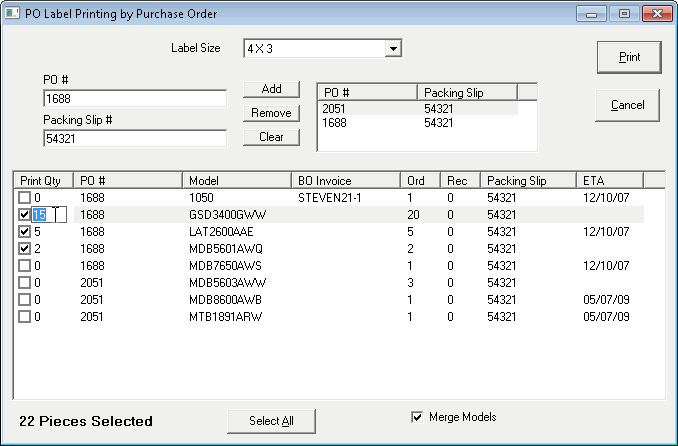
Once you have select all the product that is coming in then just click Print to print the labels.
To print labels for product already received in EPASS, click the button
on the toolbar  that looks like a label with a barcode. This will allow you
to print labels either by PO, individual model/serial number, or for an
entire location or bin. You may also want to print labels for several
pieces that you just transferred to the show floor but, for that, scroll
to the bottom of this guide and read the section about printing labels
for everything you just transferred.
To print labels for an entire PO, just click "Labels by PO #", then enter the PO #. You can either print labels for everything ordered on the PO (whether it was received or not), or you can print labels for only what was already received on the PO. Just choose the appropriate option to the right of the PO #.
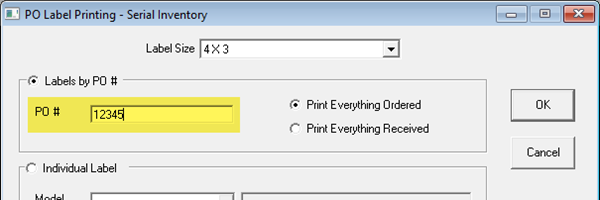
To print labels by model/serial number, choose the "Individual Label" option. Once you type in a valid model number you can choose an available serial number from the serial drop down.

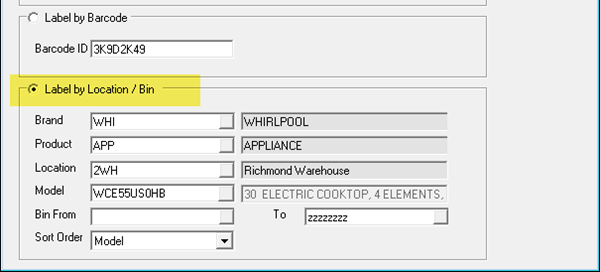
To print a label by the eight character barcode that is generated by EPASS, choose the "Label by Barcode" option and type in the eight character barcode ID.

To print labels for an entire location, or for one bin choose the Label by Location/Bin option. Select the appropriate location from the drop down and choose a range of bins if you only want to print those bins. You can also narrow your selection by selecting a Brand code, Product category, Location, and Model code.
You can also choose the order that the labels print from the Sort Order dropdown (Model, Brand/Product/Model or Product/Brand/Model). This depends on how the location is physically organized: if you keep product types together then select Product/Brand/Model. If you keep brands together then select Brand/Product/Model.
If you just transferred several pieces of inventory to another location and you want to re-print labels for everything, this is the quickest way to do it. Of course, you could do it using the individual label method described above, but that requires too much effort.
To print labels for everything you just transferred, click the button
on the toolbar  an antenna. That will open the Wireless Activity screen that
show everything that has happened with the scanners.
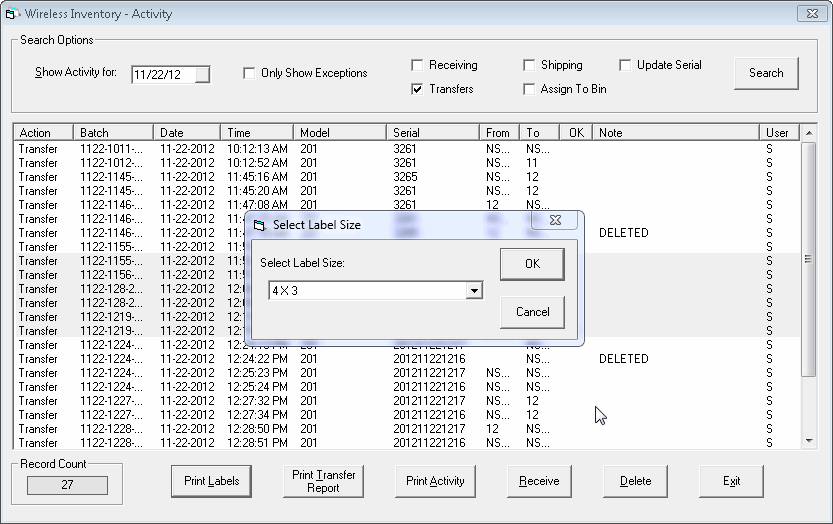
First, pull up everything transferred today by selecting the correct activity date and then make sure that only Transfers is checked. Then click Search. Once you see a list of all the transfers from today, simply multi-select (hold Ctrl and click on each line) the ones you want to print labels for then click the Print Labels button.
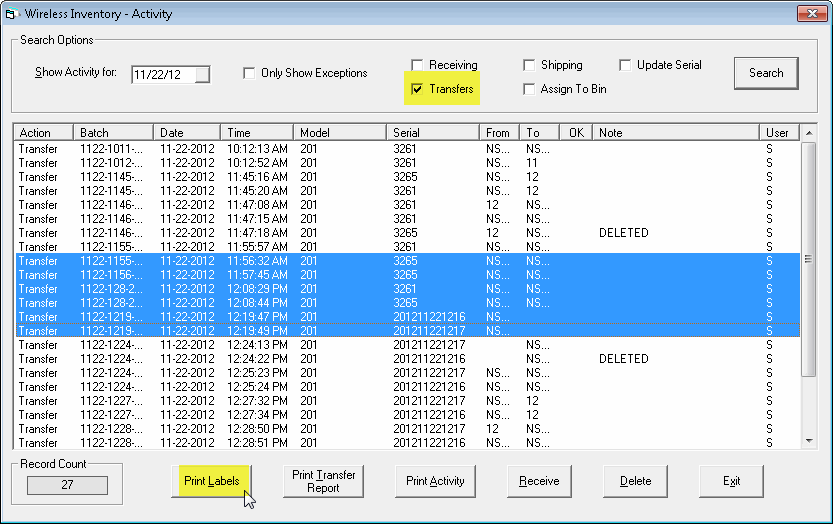
Then you just need to choose the desired label size and click OK to print.
